How to Increase the Max File Upload Size Limit in WordPress

When you Install a WordrPress the Default Max File Upload limit is always low . Low WordPress upload size limit stops you from uploading large files, plugins, and themes. For most of Media heavy Website like WooCommerce Sites, App Downloading Website it is a considerable obstacle. those It’s necessary to increase the max upload size in WordPress or your server (or both) in such cases.
Depending on which Hosting are you using the process is little bit different. We’ll cover them all in this article and show you how to increase the maximum upload size in WordPress quickly.
What Is the Maximum Upload Size in WordPress?
Uploading large files to a server consumes a lot of the server’s resources. To prevent users from causing server timeouts, the default maximum upload size in WordPress typically ranges from 4 MB to 128 MB. Usually, the hosting provider sets this limit at the server level.
WordPress also includes constants that define this limit, but they cannot override the server-level settings in most cases.
How to Check the Current Maximum Upload Size in WordPress Site ?
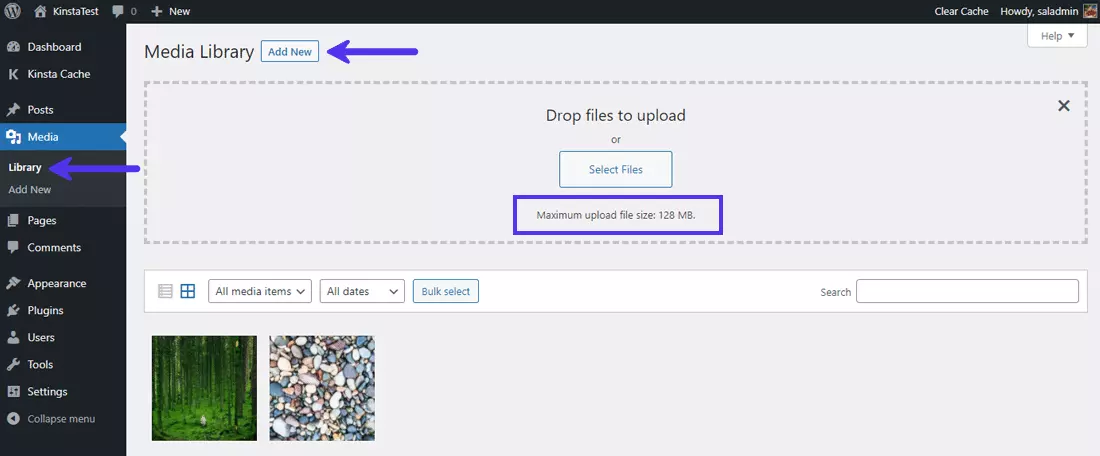
The quickest way to check your site’s current maximum upload size is to go to your WordPress dashboard, and from there, go to Media > Library. Here, click on the Add New button to activate the media uploader tool.

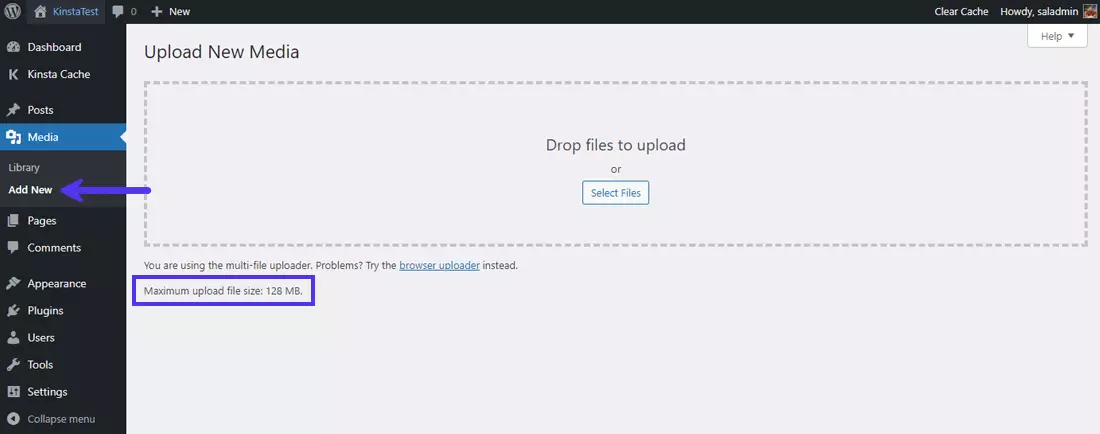
You can also go to Media > Add New directly and see the same message displayed at the bottom.

Again, you can see the 128 MB max upload file size here.
Top 3 Ways to Increase the Max Upload File Size in WordPress
There are many ways you can fix the WordPress maximum upload size issue. We’ll start with the easiest ones first, and then we’ll move on to the intermediate-level tutorials.
1. Contact Your Hosting Provider for Help
this is the easiest one , If you’re facing issues with uploading files and file size limits, reaching out to your hosting provider for assistance is one of the quickest solutions. Increasing the upload limit is a trivial task for tech support, so most hosting companies can help you fix this issue quickly.
2. Update Your ‘.htaccess’ File
If your webserver runs on Apache, you can update your site’s .htaccess file to increase the max upload size in WordPress. You can find your .htaccess file in the WordPress site’s root directory.
As per PHP documentation, three PHP directives are responsible for how WordPress handles uploads. They are:
php_value upload_max_filesize 64Mphp_value post_max_size 64Mphp_value max_execution_time 300php_value max_input_time 300memory_limit
We’ve already discussed them in the Site Health Info section above. It would help if you modified these three directives’ values to admit your file sizes. For instance, if the largest file you’re planning to upload is 32 MB, we recommend the following settings:
upload_max_filesize = 32Mpost_max_size = 64Mmemory_limit = 128M
Notice, all the values use M instead of MB. That’s how PHP handles its directives.
3. Change PHP Options via cPanel
If your hosting provider uses the cPanel dashboard to help you manage your server and site configuration, you can change the max upload file size through its interface.
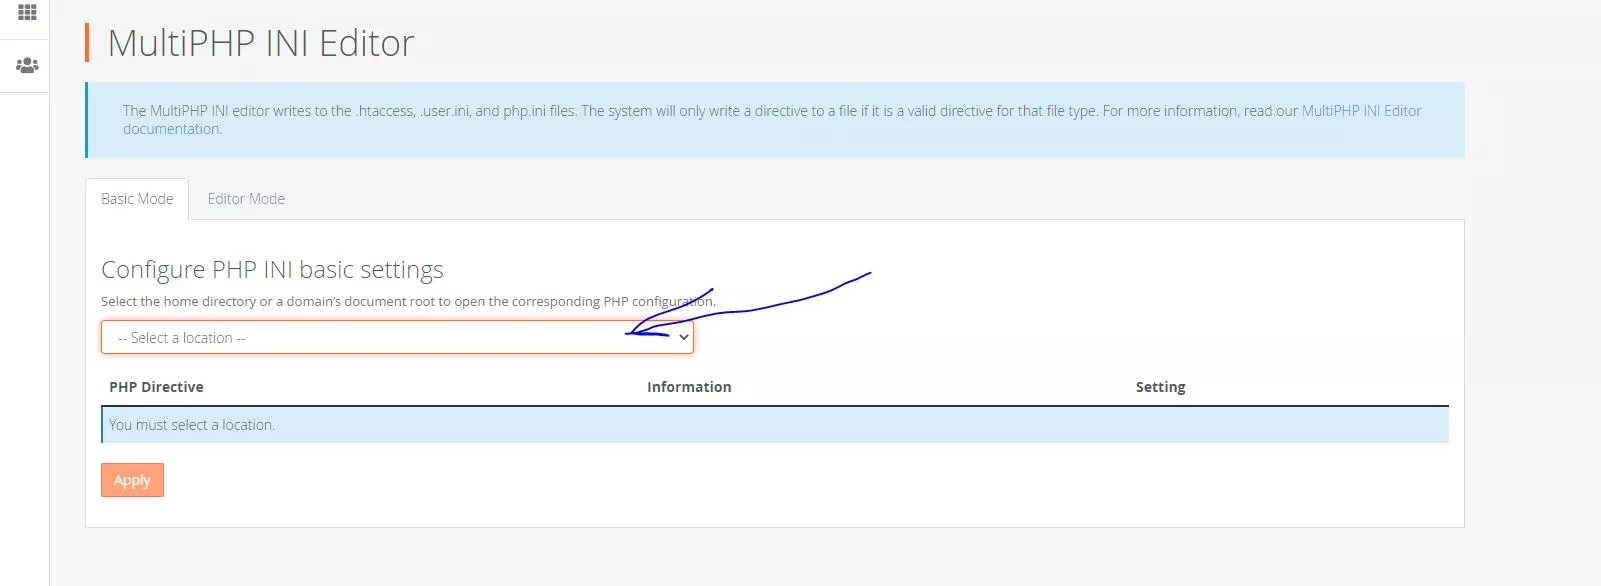
To get started, go to your cPanel dashboard, and select the Select PHP INI Editor under the Software section.
Here Select The Domain Where you have installed the WordPress.
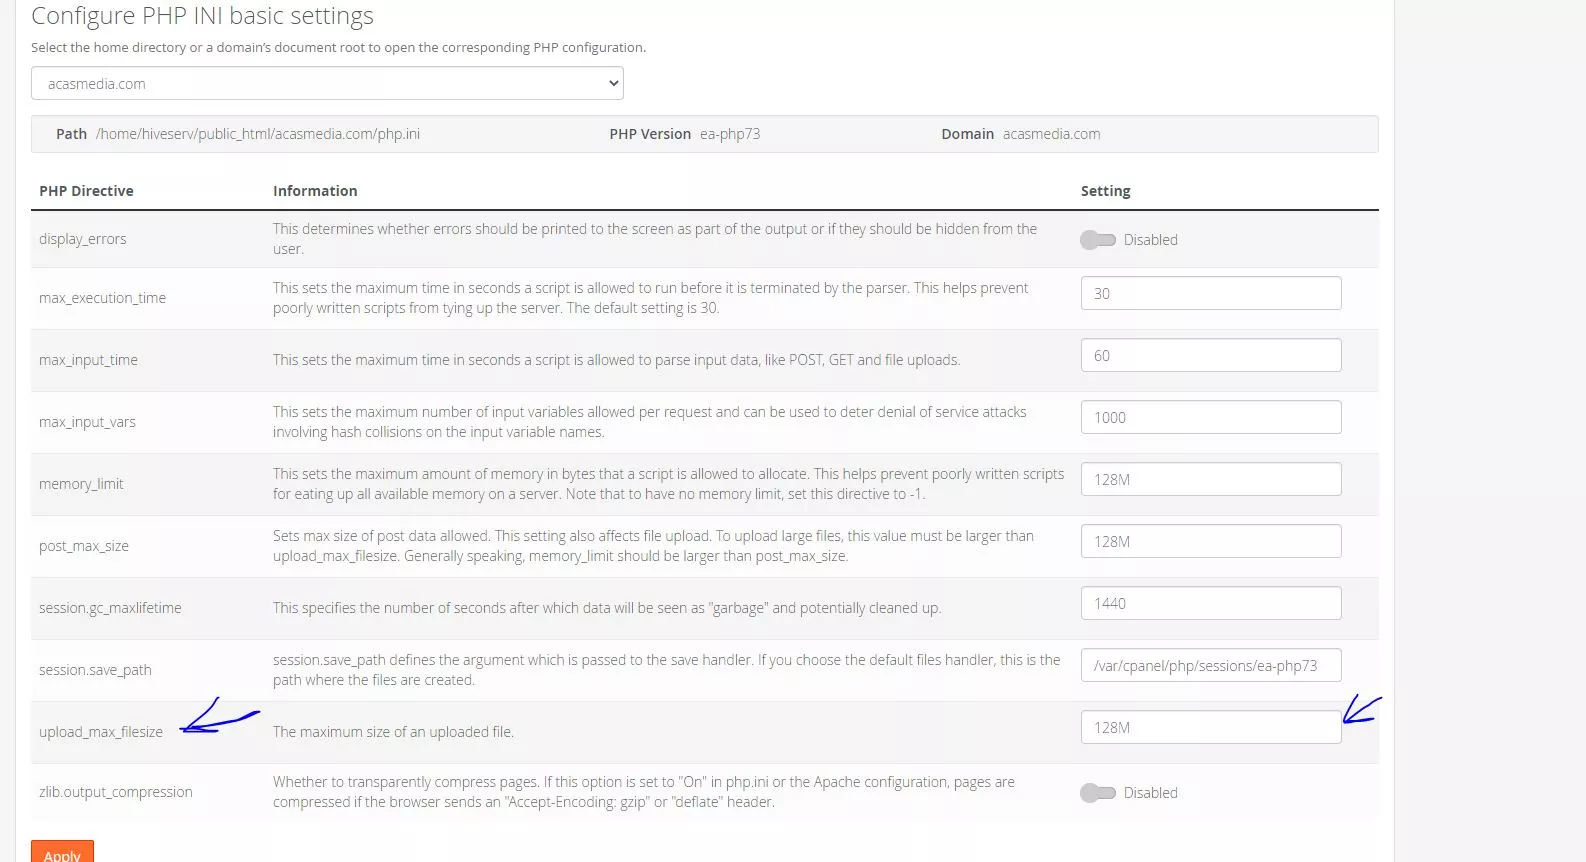
Scroll down here to modify the values of PHP directives such as upload_max_filesize, post_max_size, memory_limit, max_execution_time, and max_input_time. The max values you can set here depend on your current hosting plan. then just click The Apply Button.
Summary
As you’ve seen, increasing the maximum upload file size in WordPress isn’t too complex. Whether you’re building a media-heavy site or installing a large theme, it’s just a matter of knowing where to look for and what commands or tools to use.
Subscribe us on YouTube For More : https://www.youtube.com/c/HIVEcorp/


